|
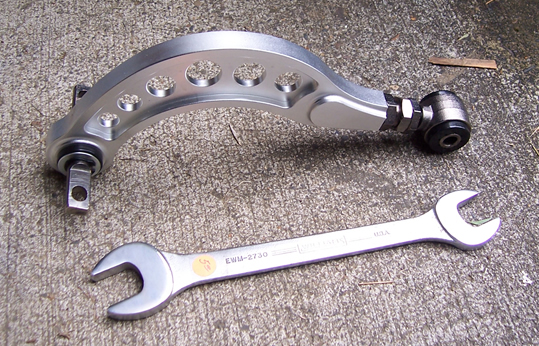
Adjustable "on the vehicle" Upper Rear Control Arm for 8th Generation (2006 - 2011 ) Honda Civic |
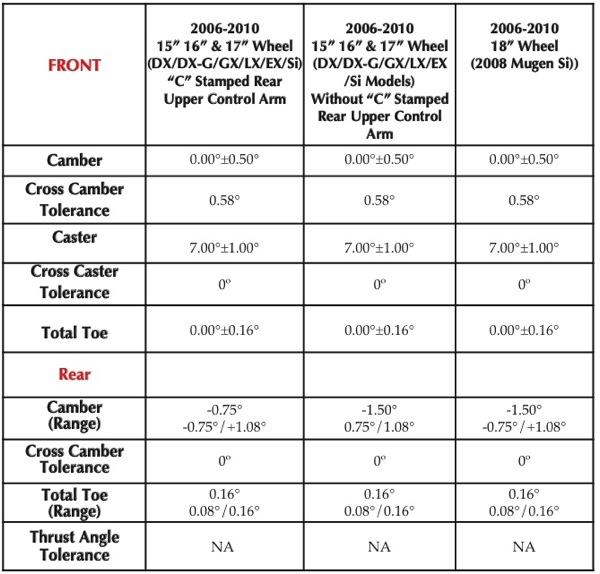
As they came from the factory 2006 - 2011 Honda Civic's do not have an adjustment for camber - front or rear. The 2006 - 2007 Civic's (and many 2008 Civic Hybrid's) have more negative camber at the rear suspension than the later model years. Some 2006 & 2007 Civic's were updated to the 2008 - 2011 upper rear control arms under warranty. If the upper rear control arm is stamped with a "C" your vehicle has the revised part. The "C" upper control arms reduced negative camber by .75 degrees. Why be concerned with camber? Excessive camber can lead to uneven tire wear, and because camber is not adjustable (even with the revised "C" upper control arms) one way to get the 8th Generation Civic's negative rear camber under control is with a set of adjustable upper rear control arms. Note that when you change camber the toe-in / toe-out is also effected.
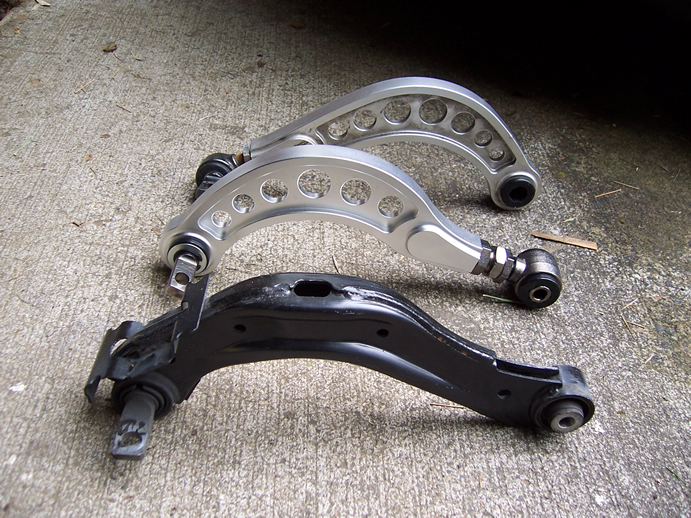
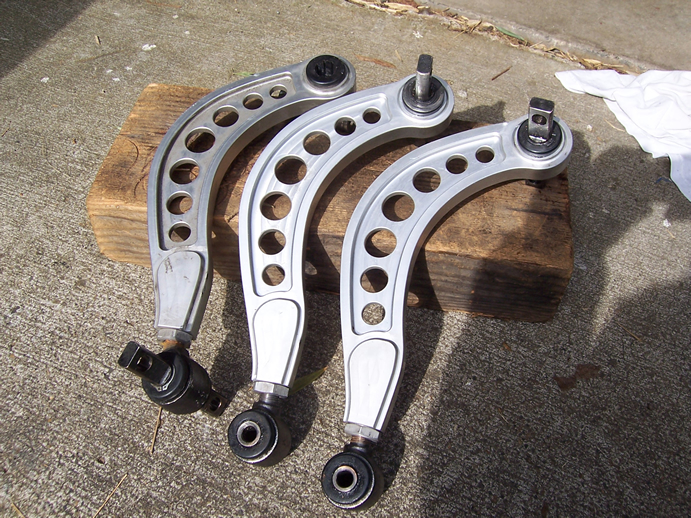
Pictured here is an original upper rear control arm from a 2007 Civic LX. The middle control arm is adjustable using the three nuts at the wheel side attachment point. Notice that the shape of the control arm in the middle emulates that of the original part. The control arm at the top of the photo was pre-assembled backwards. This caused the control arm to hit the underside of the vehicle and ultimately bent one end. This particular type of control arm must be removed from the vehicle for it's camber adjustment. The adjustment must be made at the side facing the wheel. If the parts your purchase are pre-assembled backwards you must swap ends. The bushings can remain where they are as they should be the same specification.
On the left is the "adjustable on the vehicle" upper rear control arm. On the right is an example of what happens if the control arms are assembled backwards - you end up with one ~bent~ part!
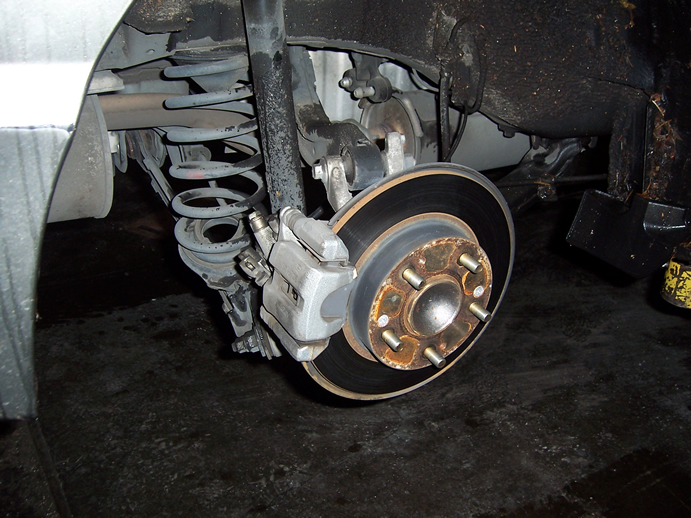
To change upper rear control arms first remove the wheel. Shown is a 2006 Civic EX.
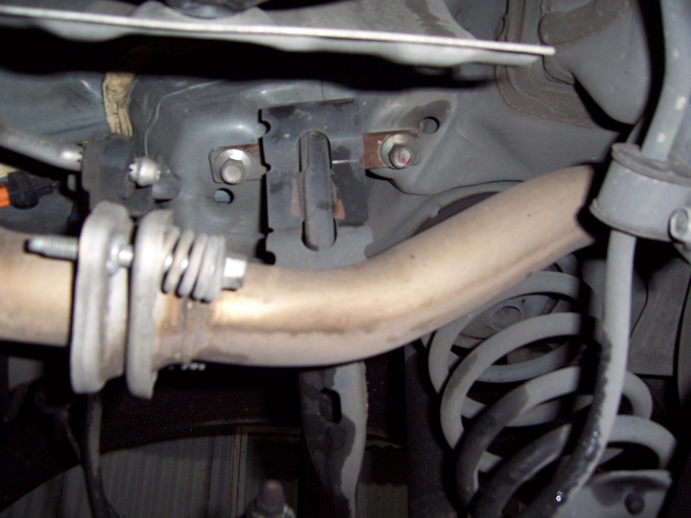
To gain access to the upper mounting bolts on the passenger side the muffler can be separated from the rest of the exhaust system. Removing the two attachment bolts is sufficient to allow access, the muffler doesn't have to be physically removed. . What's wrong with this picture? The upper rear control arm was assembled backwards. The adjustment end of the control arm should attach to the wheel side.
The after market upper rear control arm will require that you insert the mounting rod. Before doing that use a polyurethane lubricant in the bushing. Make sure that all of the indentations inside the bushings (one per side) are filled with the lubricant. Lubricate BOTH sides of ALL polyurethane bushings to reduce the chance of squeaks and other noises.
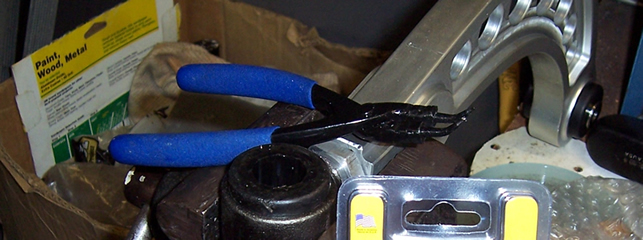
Snap ring pliers are a must when seating the snap ring on the rod end.
<<< Additional Resources >>>
Shouldn't the Rear camber range in the middle and right columns read -1.50 to +1.08?
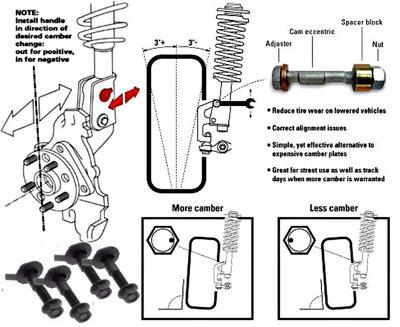
Sometimes referred to as "Crash Bolts" Camber Bolts can be used on the Civic's front suspension to fine tune camber settings.
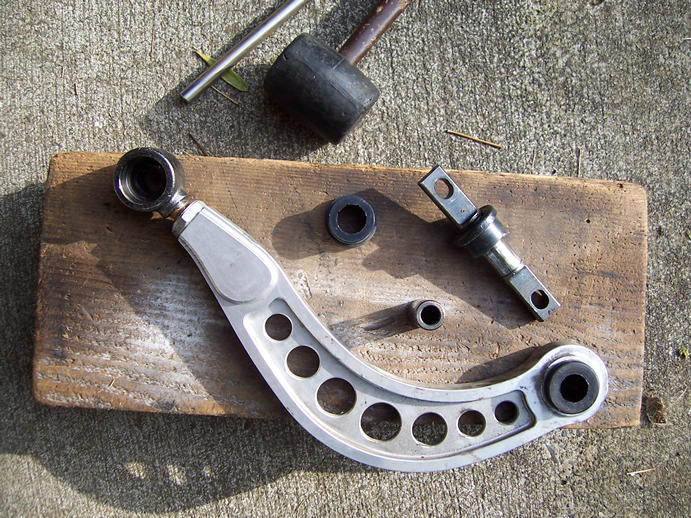
Components of control arm prior to re-assembly.
|
Control arm in the center and on the right are correctly assembled. One on the left was pre-assembled backwards and should not be used in this configuration.
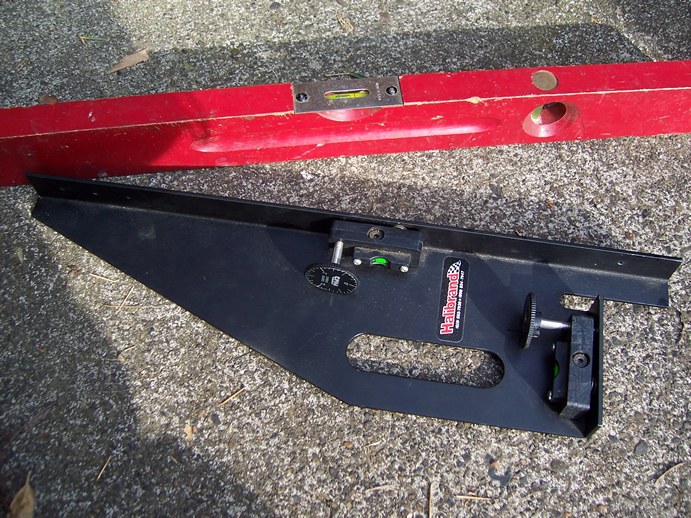
To accurately measure camber on the vehicle you will need tools such as these. Changes made to the camber will effect toe-in / toe-out. Note that Honda calls for just a touch of toe-in. Camber settings may have to be compromised in order to stay within the acceptable toe-in specification. As you decrease negative camber the result will be an increase in toe-in. Once new control arms have been installed, and initial adjustments made, a professional alignment is highly recommended.
What can be done with tires badly worn from excess negative camber? Have the tires dismounted on the rims, then re-mounted in a way that moves inside wear to the outside. These tires / rims should now be moved to the opposite side of the vehicle, the direction the tire has been rotating will remain the same. Have the tires re-balanced before installing them.
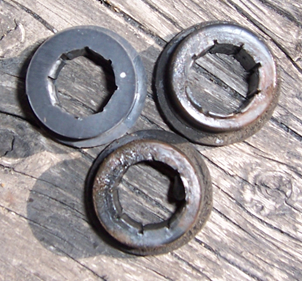
What Could Possibly Go Wrong? Apparently quite a bit. For some reason (yet to be determined) two of the bushings wore out after several thousand miles. On the top left is a new bushing. The other two wore out in an elliptical fashion. Occasionally check the control arm bushings for wear. With the vehicle off the ground grasp the top and bottom of the tire, checking the bushings for play. If you detect any movement you will need to replace the bushings. Not knowing what caused the excessive wear it was decided to lubricate both the inside and outside of the replacement bushings before bolting the control arm back into the vehicle. The control arm should pivot freely and not bind as the wheel & tire travel up and down. Where can you purchase replacement bushings? Skunk2 bushings are a perfect match for the ones that originally came with the control arms seen here. There are various venders on eBay that sell these bushings. The previous version of the Skunk2 bushings are harder than the ones that came with these control arms. These are sometimes sold as being " Skunk2 style " but are actual Skunk2 bushings, just the older version of them.
How To Adjust Rear Toe-In / Toe-Out Relationship Between Camber and Toe-In / Toe-Out Link To GreenHybrid Discussion of 2006 - 2007 Civic's Negative Camber Concern 8th Generation Honda Civic Forum Search YouTube for the latest How To Video's
Proposed..... Honda Civic Tire Wear SettlementHonda Civic Tire Wear / Control ArmClass Action Lawsuit
Last updated on 6/11/16 |